
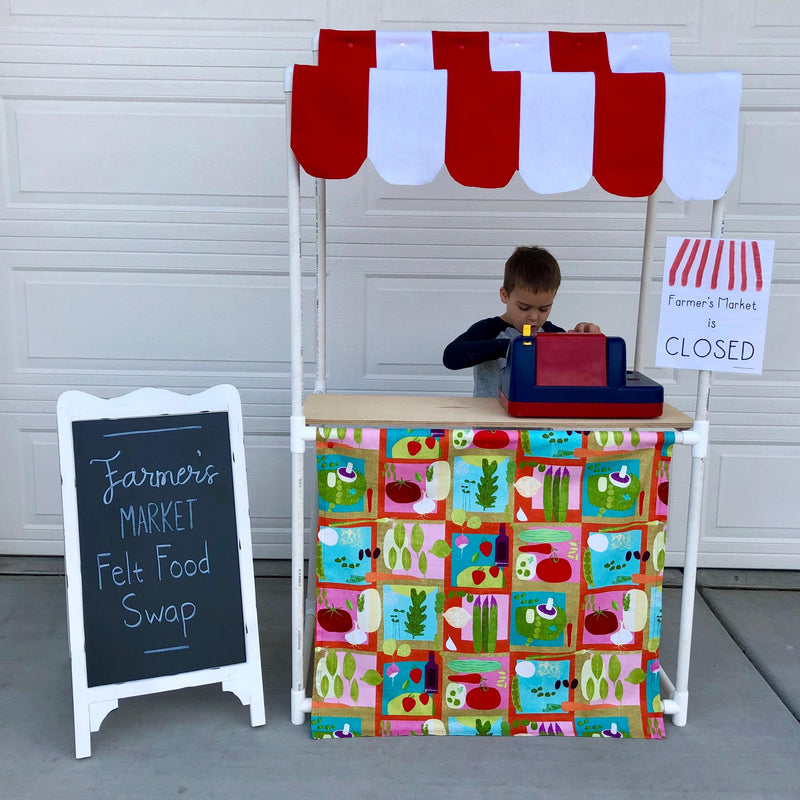
This stand is the perfect little set up for dramatic play in your classroom or home. I love how versatile it is - going from farmer's market stand to lemonade stand to pizza shop with just a change of fabric or signs. I also love how it can easily be taken apart for transport or storage!
Use my Farmer's Market Felt Food Templates and my Farmer's Market Learning Activity Bundle for a complete learning through play set up!
Building the Frame
We used this excellent tutorial from Formufit to make the base out of PVC pipe. We were able to get everything except the 4-way tee from our local Home Depot. We had to order those online.
We ended up using 3/4" PVC pipe. The instructions say 1.5" PVC pipe, but that seems large to me!
We also didn't cut out notches for the board. We just used a 12" x 35.5" piece and screwed it on to the PVC pipe.

The Shade Canopy
I had a vision, and this is where I strayed from the above directions. You will need 3 strips of red felt and 3 strips of white felt cut to 7" x 36" (you can buy 1 yard of each color).
- Cut one end using my curved template. Get it for free at the end of this tutorial by signing up for my email list and it will be sent to you.
- Next place a white strip on top of a red strip and sew along the right side, using a 1/2" seam allowance.

- Repeat Step 2 for the remaining two sets.
- Open a red/white piece up along the seam and place another red strip on top of the white strip. Sew along the right side.
- Continue this process with alternating colors until you have all six pieces sewn together.

You have a couple of options with how it attaches to the frame.
The first is to simply fold it over the top of the upper PVC pipe to see how much room you'll need and sew across the width of the 6 pieces. This will create a tube pocket that the PVC pipe will slide through.
The downsides are that you will have to take your stand apart in order to change it out and you may have to trim off the edges to get it to fit without getting stuck in the corner pieces.
The second option is what you see in the picture below. The felt just wraps around the pole and snaps together. I used Kam Snaps and Kam Snap pliers to install snaps at each color. They are simple to install. Here is a video from Kam Snaps that shows how to do it. I put a snap in the middle of each color.
Another option that I have not tried, but would probably work would be hook and loop fastener. I don't think it would be as sturdy if it got pulled though.
The downside is they need to be even or else your canopy will not be level. My snaps are located about 1/2" away for the edge for the male prong and 4.5" away for the female. Make sure you are folding it over and visualizing on which side the cap needs to go.
Once it is attached to the upper pipe, the canopy simple drapes over the lower pipe.
The Decorative Fabric Panel
This is where you can get fun fabric to add to your stand and easily change it out to a different play theme. I bought vegetable fabric for this Farmer's Market stand. You can do lemons for a lemonade stand, cups and saucers for a coffee shop, cupcakes or cakes for a bakery, pizza for a pizza shop, etc.
You will need 1 yard of the fabric of your choice.
- Cut it to 33" x 33".
- Fold over one side 1/2" and press it.
- Then fold it over on itself another 1/2" and press it again.

- Now sew along the edge (the side furthest away from the fold).
- Repeat steps 2-4 for the other three remaining sides.


Now again, like above you can choose to sew a pocket that the pipe slides in to or you can install snaps that allow the fabric to go over the pipe without having to remove it. The snap measurements are the same distance from the edge above, and I used one on each edge and one in the middle.
Either way, the bottom of the fabric hangs loose over the lower PVC pipe. Adjust the top when you are sewing or installing snaps so that it hangs at the right spot.
Now all you need is a cash register and a receipt pad (see my blog post here on how to make your own) and your little ones are ready for customers!
Get the template for making the curves by joining my mailing list here.

I love this so much!! Thanks for the super helpful details! ❤️